Our Marabou pommanders!

I did them with chandelle feathers first; but they looked like they were falling all apart! So, I decided to try one with a Marabou boa. I LOVE how it came out! I used one 2yd boa ($4 HL) a 4" syrofoam ball ($1 DT) and floral pins ($1 wal-mart) I kinda lifted where I wanted the pins to go so that the feather would "fluff" around them and hide them. I think they came out totally awesome!
* Insparation from this piece is from Knottie cmkuno *
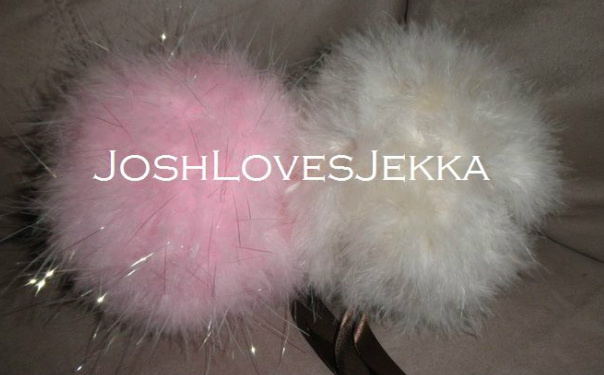
I finally found Ivory boas! I got them from ebay seller cynthiasshope. If I had been able to see them in person, I would have gotten a heavier weight, but they are a really good quality and I used them anyway. they came out perfectly. And I just love the feathers over flowers!
Our Sand Ceremony Vases
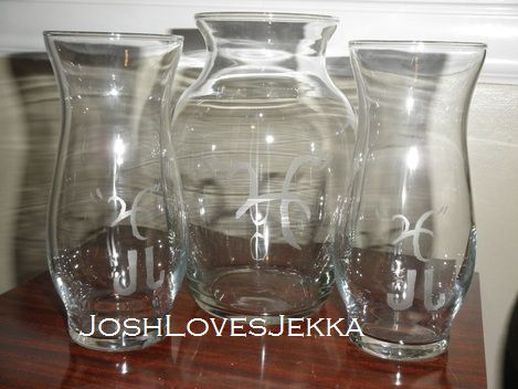
I LOVE my man! He really does try to help me out. We totally worked on this project together. We both decided what to put on them and then he helped me to etch them.
We got all 3 vases at the Dollar tree for $1 each the etch cream and tape were from other projects. So total = $3!
We got all 3 vases at the Dollar tree for $1 each the etch cream and tape were from other projects. So total = $3!
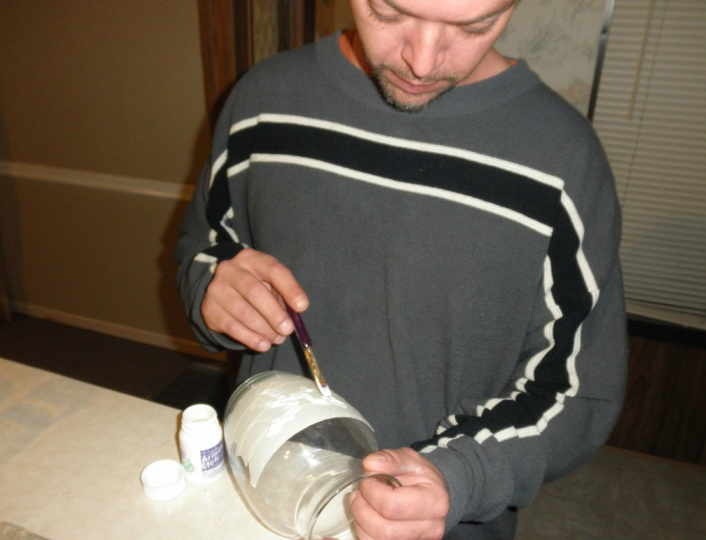
Josh etching the vases
Ceremony "sand"
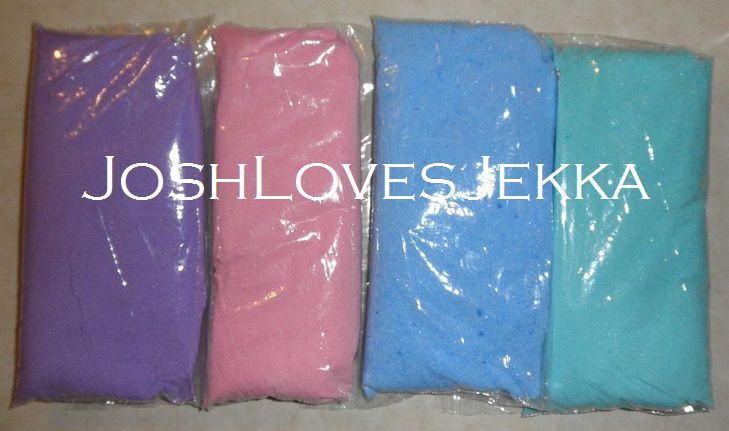
I wasn't intrested in just keeping it our wedding colors. I wanted it to be more "us" so I made each of our favorite colors: Green for me, blue for Josh and pink and purple for our daughters.
Ok, so this isn't *exactly* sand- it's salt!
I origianally tested it with Dollar Tree's "Decorators Sand"; but couldn't find it when I went back to start the project. So I used the next best thing, salt!
I picked up 2 containers of sea salt for $2 and a pack of markers for $1. I measured the salt out first, then took the color felt out the back of the marker and boiled it with 2/3 cups of water. After the water boiled, I dumped the salt and colored water in throw away pans I also picked up at the Dollar Tree. I baked the salt and water in a 350 degree oven for 30 minutes, 2 pans at a time. The next step was REALLY important, I let it cool and finish drying over night. The next morning broke the huge cunk it became into smaller pieces and then put the pieces in a coffee grinder and finished it up. I made sure to wipe out the grinder between colors, I didn't want to mix the colors and have some funky tye-dye "sand" going on.
It was a pretty easy project and VERY inexpensive! For 1 hrs time and $4, I have Blending Ceremony "Sand"!
Our ring dish (take 2!)

It's a little different from the original dish, but we made this one 3 inches as opposed to the 4 inch dish before.

... and with our rings...
|
At first, we tried to make one with homemade clay. That didn’t work out for us! (Huge mess: lots and lots of flour all over the place, sticky hands, and Josh totally laughing at me!) So off to HL we went! We looked at every bit of clay they offered, and I wanted something that would be really easy for me to form (Me and my broken arm). We wound up getting Crayola® clay ($1.87 with coupon), brown craft paint ($0.67) and pink ribbon ($ 1 ½ off sale). After a bit of shaping, Josh put in his signature 4E and I added our date. It took a week for it to thoroughly dry. Then I painted it and added the ribbon. Overall cost: $3.54! We were able to get 2 dishes from all of the first purchase. So each dish really only cost us $1.77! |
Our Aisle Mat
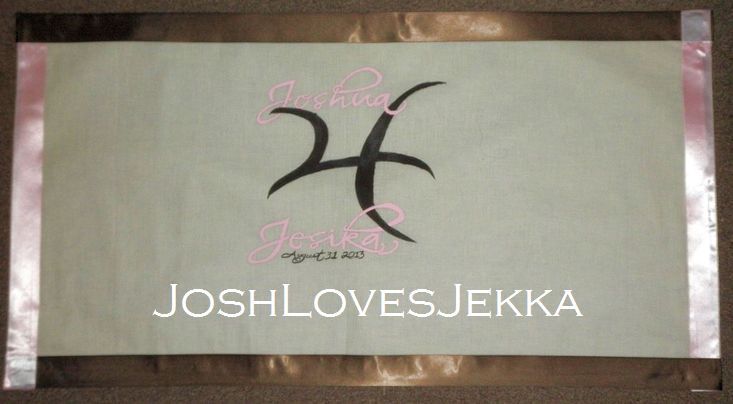
I like the looks of aisle runners but don't want the hassle of one. So while cruising DIY one day I came across stefwhitney's post about her aisle sheet. LOVED IT! (You can check out her awesome bio HERE) And although I couldn't get Josh to do it for me, I still think it rocks!
I used acrylic paint, a yard of muslin, 1 1/2in pink ribbon felt interfacing and stitch witchery tape. I printed out our 4E monogram, and used a pencil to copy it onto the muslin. I then painted everything using waxed paper taped to the table to prevent boo-boos. After 24 hours I ironed on the felt back using the stitch witchery tape. I ironed it on the face first then flipped it over and ironed on the back edges of the muslin. Lastly I used it to iron the ribbon onto the edges to finish it up. In my first virsion I didn't use the brown ribbon, but I really like the way that it came out with it.
Total cost: $5.61. The stitch witchery was $1.88; the felt was 1.74 and $1.99 for the muslin. Everything else was something I had on hand!
*Inspiration for this project goes to stefwhitney*
Our "Jumping Broom"
|
I am proud to say that I am 1/2 African American. I may not look it (I take after my much lighter mommy), but I never ever EVER hide the fact. And I don't let my children forget their history or what their great-great (+) grandparents went through for them to be able to be here today; as well as what MY parents went through as a bi-racial couple just a few decades ago! To honor our family and traditions in my line, I spoke with Josh and asked him if it would be alright with him if we "jumped the boom" after our ceremony or as we entered our reception. I described what it stood for and why it was important for us to do this and he agreed. (It didn't hurt that he and my dad are best stinkin friends!) So THIS is our Broom! As I worked on it I asked Josh what he wanted the outcome to be. All he said was, "keep it simple and pretty". I used scrap fabric from our aisle mat as the base (0!), ribbin I got for our kids books (0!) and napkin rings (0!), feathers I had oredered for my bouquet and bouts (0!) and rhinestones left over from table numbers (0!). The total cost for this project was $11, for the broom and shipping which Knottie Dannitra01directed me to *here* |


|
